- Shopping, made easy.
- /
- Get the app!
The kaleidoscope's vibrant patterns are the result of light reflection: the three mirrored surfaces of reflect the image of the colored chips multiple times, forming a symmetrical hexagonal pattern. When shaken, the position of the chips shifts, and the reflected pattern changes accordingly, resulting in an endless variety of patterns. Steps 1. Make Fold the reflective surface into an equilateral triangle. Secure the edges of the lens with the adhesive tape included in the packaging, ensuring is stable and the corners are perpendicular. 2. DIY the Kaleidoscope Shell Use your imagination and creativity to draw your favorite colors and patterns on paper. Attach the kaleidoscope shell. 3. Attach the Pattern End (the "source" of the pattern during observation) Place colored chips in the gap between the plastic sheet and the shell (don't put too much; allowing room for movement will create a richer pattern). Seal the gap to prevent the chips from leaking out. 4. Attach the Observation End (the side you see through). Cover the gap with a piece of clear plastic and seal it securely. 5. Adjustment and Perfection Shake the kaleidoscope and observe whether the pattern seen through the small holes is clear and symmetrical. If the pattern is blurry, adjust the position of to ensure it fits snugly against the transparent sheet. Features -Material: Paper. -Dimensions: 18.8 x 4 cm / 7.5 x 1.6 inch

 Abaodam Stacking Playthings Russian Nesting Doll 5 Pieces Household Wood Crafts Halloween Themed Stackable Doll Ornament Halloween Nesting Toy Gifts Russian Stacking Dolls
SAR 96
Abaodam Stacking Playthings Russian Nesting Doll 5 Pieces Household Wood Crafts Halloween Themed Stackable Doll Ornament Halloween Nesting Toy Gifts Russian Stacking Dolls
SAR 96
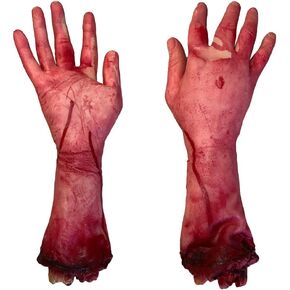 Abaodam 2pcs Severed Hand Dog Toy Fake arm Halloween Body Parts Dog Dead Prop arms Cosplay- Hallowen Broken Foot Scary Decorative Handmaded Severed Hand for Men Halloween Decor Party
SAR 162
Abaodam 2pcs Severed Hand Dog Toy Fake arm Halloween Body Parts Dog Dead Prop arms Cosplay- Hallowen Broken Foot Scary Decorative Handmaded Severed Hand for Men Halloween Decor Party
SAR 162
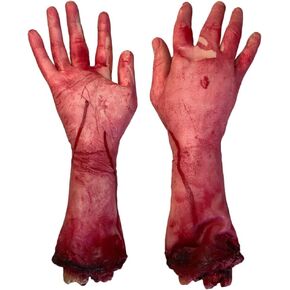 Abaodam 2PCS Tricky Toys Dog Toy Halloween Party Cosplay Props Severed Bloody Hand Broken Bloody Arm Limbs Horror Halloween Decoration Novelty Dead Broken Hand Gadgets Fools Toy
SAR 111
Abaodam 2PCS Tricky Toys Dog Toy Halloween Party Cosplay Props Severed Bloody Hand Broken Bloody Arm Limbs Horror Halloween Decoration Novelty Dead Broken Hand Gadgets Fools Toy
SAR 111
 -15%
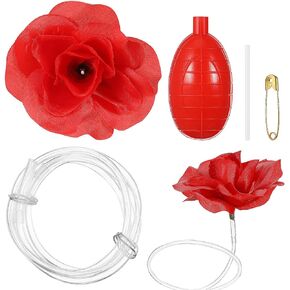
Rose Toy Novelty Badges Ornament Simulation Rose simulation flower brooch party prank props water spraying brooch Brooch Funny Water Halloween Tricky Toys Rose Toy (Sprinkler color random)
SAR 66
-15%
Rose Toy Novelty Badges Ornament Simulation Rose simulation flower brooch party prank props water spraying brooch Brooch Funny Water Halloween Tricky Toys Rose Toy (Sprinkler color random)
SAR 66


