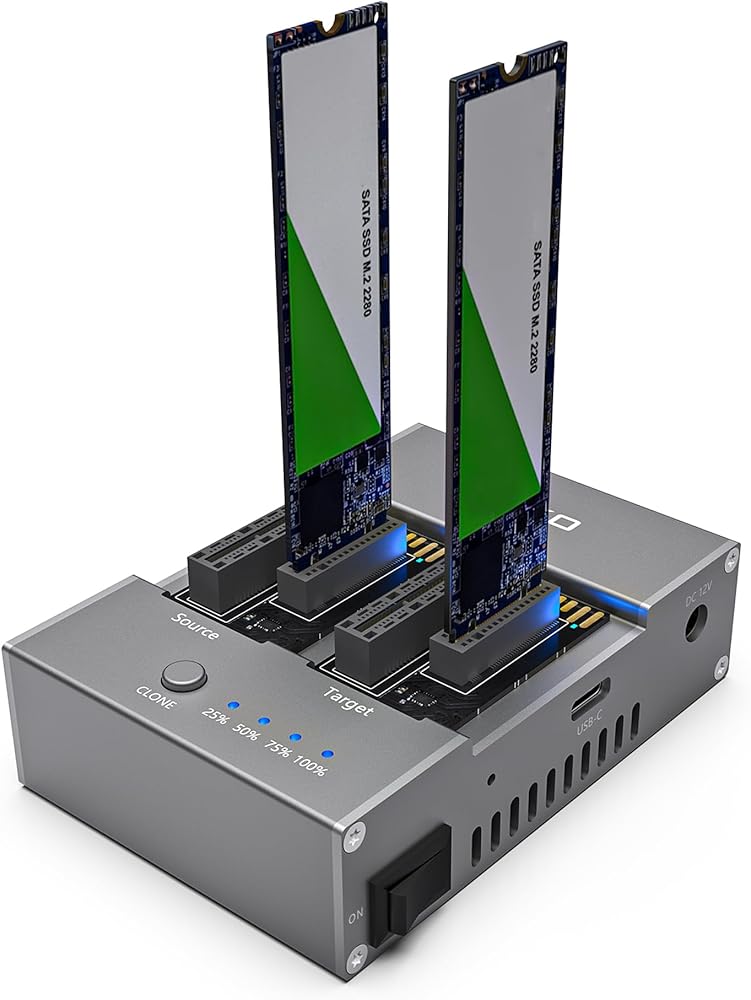
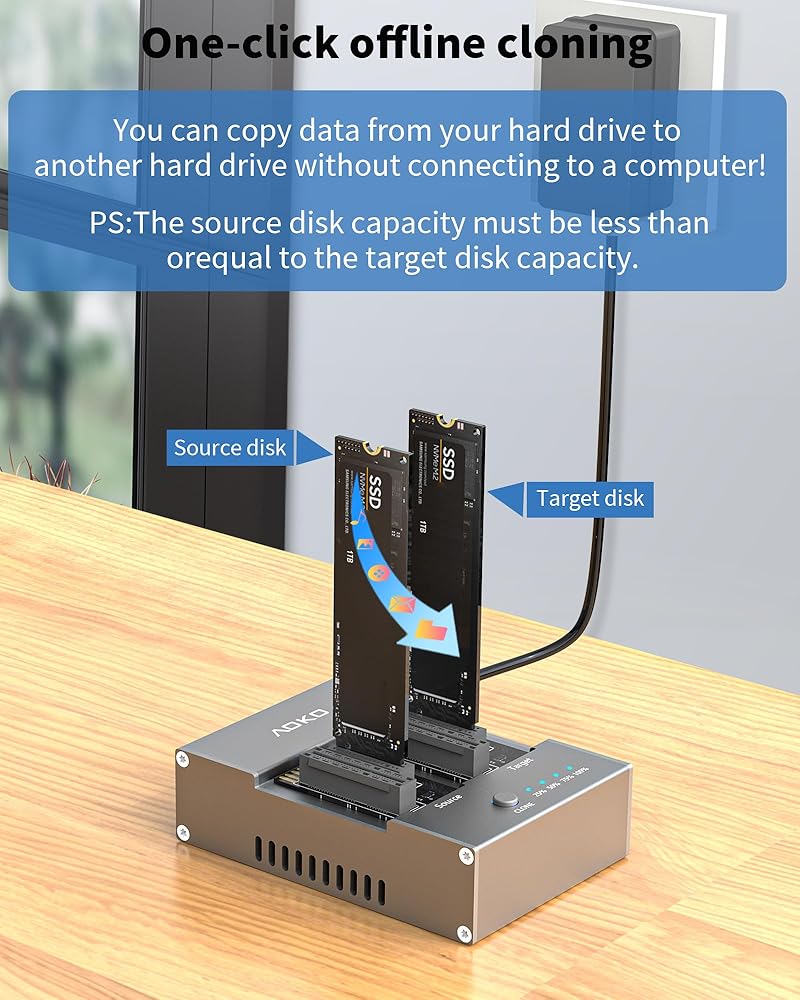
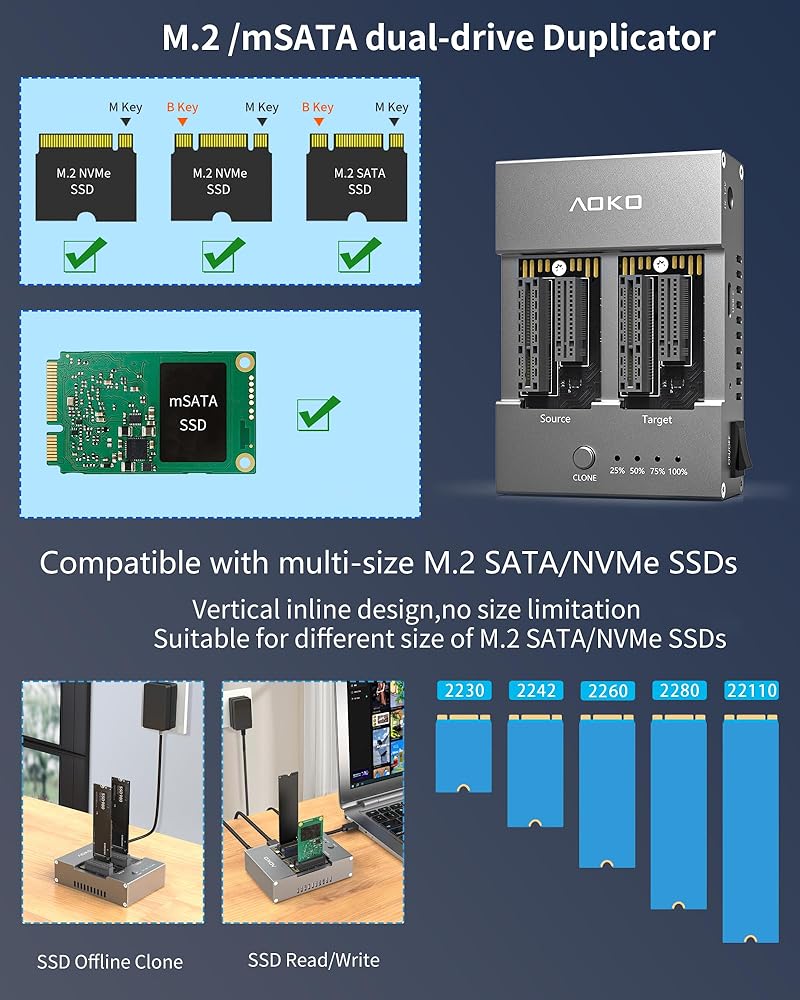
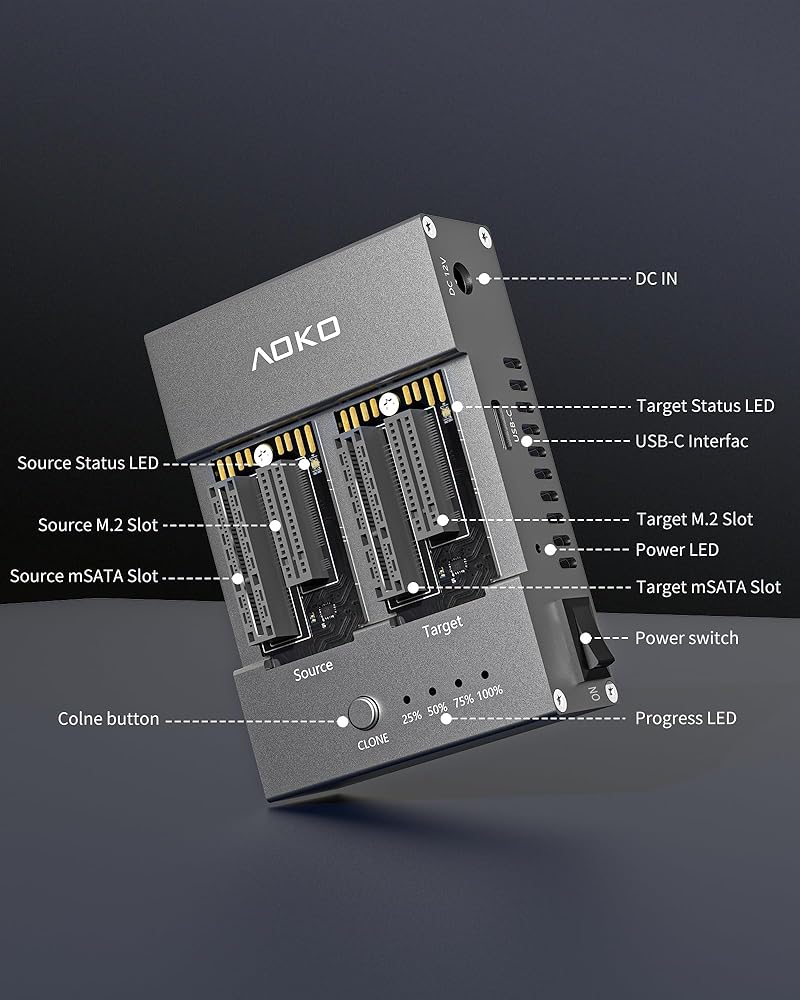
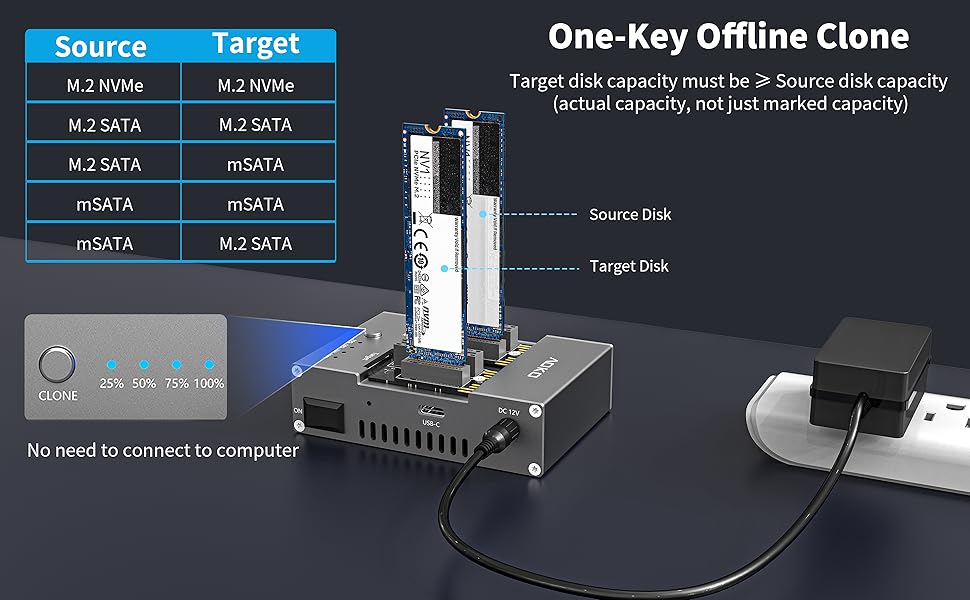
【SSD Cloner】:This SSD cloner enables offline hard drive copying without a computer, supporting five distinct cloning modes: NVMe-to-NVMe, M.2 SATA-to-M.2 SATA, mSATA-to-mSATA, M.2 SATA-to-mSATA, and mSATA-to-M.2 SATA. [Note: The capacity of the source disk should be less than or equal to the capacity of the target disk, which refers to the actual available capacity of the hard disk, not the labeled capacity]
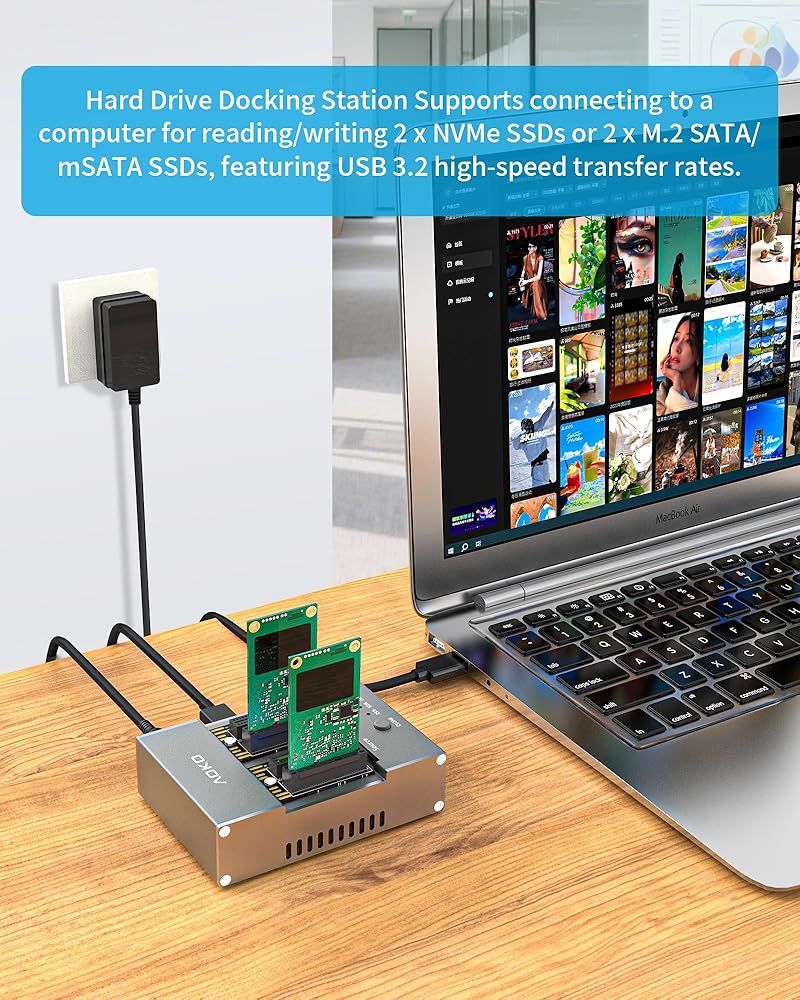
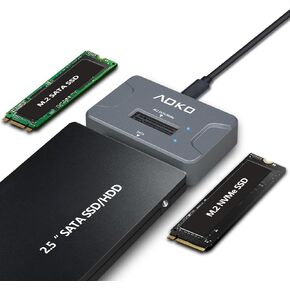
【Hard Drive Reader】This AOKO hard drive dock supports connecting one or two M.2 SATA/NVMe/mSATA SSDs to your computer for data read/write operations. It converts SSDs into USB devices, requiring no driver installation for plug-and-play functionality. (Please note: Simultaneous use of M.2 SATA and NVMe drives is not supported. Only NVMe + NVMe or M.2 SATA/mSATA + M.2 SATA/mSATA configurations are permitted.)
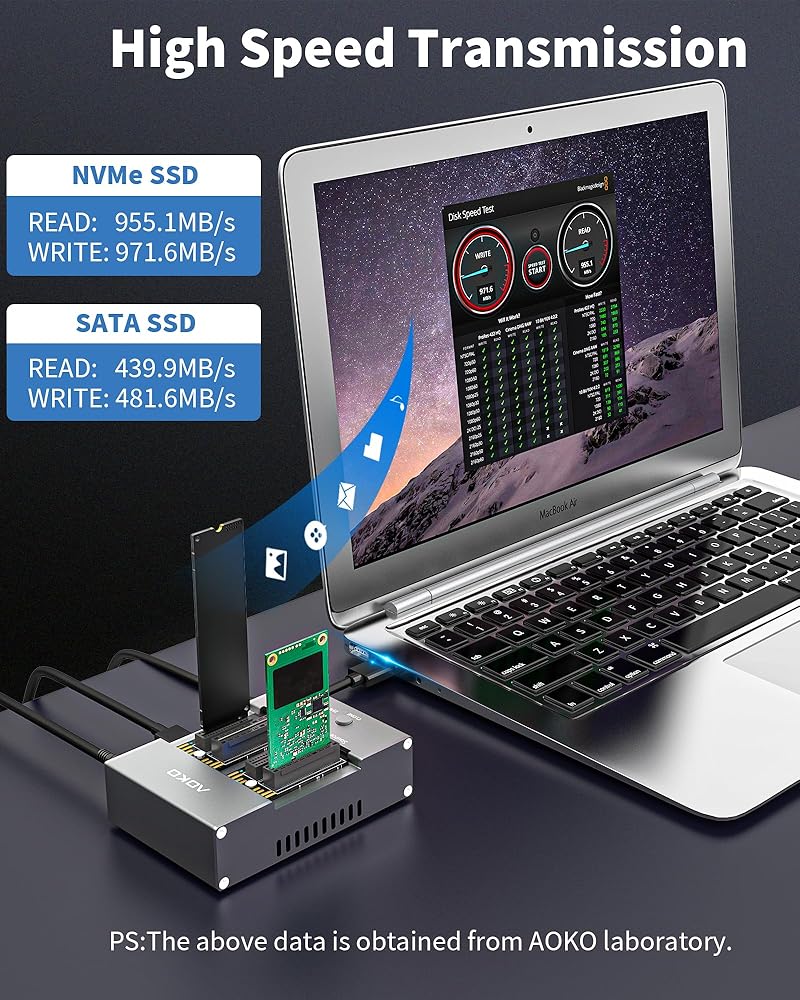
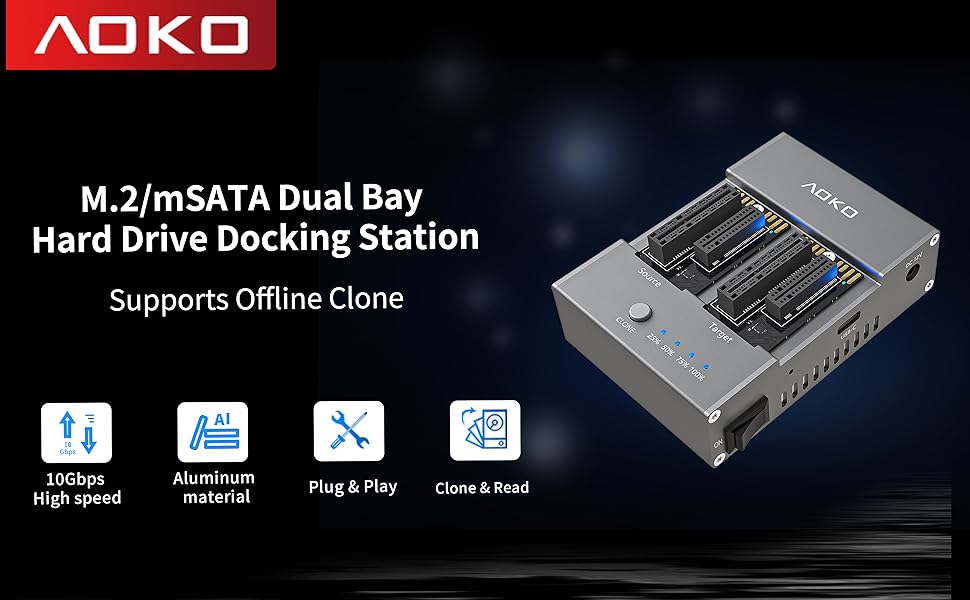
【High-Speed Transfer】 : The AOKO M.2 NVMe SSD Duplicator adopts the USB 3.2 Gen 2 10Gbps standard, supporting transfer rates up to 1Gbps/s. It is compatible with USB 2.0/3.0/3.1/3.2/3.2 Gen 2x2/4.0/Thunderbolt 3/4 interfaces and supports UASP and TRIM commands.
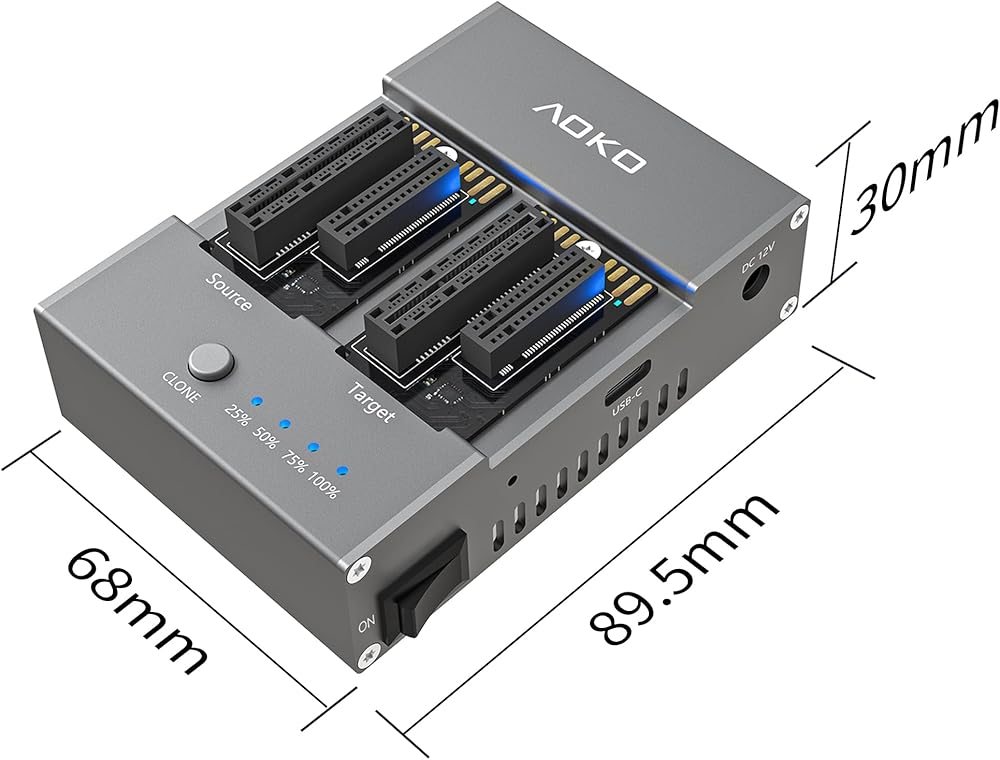
【Aluminum Alloy Construction】: The AOKO M.2 Cloner features a specially designed durable aluminum alloy casing for enhanced heat dissipation. This robust design maintains peak performance during high-intensity cloning operations while effectively preventing overheating, significantly extending the lifespan of storage devices.
【Stable Operation】: Engineered for stability, our SSD Duplicator includes a 12V/3A power adapter that delivers consistent power output for dependable high-capacity data transfers at maximum speeds. The integrated LED progress indicators provide real-time cloning status updates, while the anti-slip silicone base effectively absorbs vibrations during operation - delivering a professional-grade user experience for mission-critical cloning tasks
【Package Contents】: M.2/mSATA Hard Drive Cloner, 12V 2A Power Adapter, USB-C to USB-A Data Cable, USB-A to USB-C Adapter, User Manual
【Tips for use】 ①Insert the hard drive into the corresponding slot. ②Before cloning, please make a backup of the data on the target SSD2 and its capacity must be larger that of the source SSD1; ③Insert the power adapter, press the power button, and wait for the hard drive's bay indicator light to turn blue. long press the cloning button Until 25% of the progress indicator began to flash (indicating that the cloning has begun) can be released, the cloning process, the progress indicator will be lit in turn to show the progress, until all the progress indicator is always on, that the cloning is complete, turn off the power and remove the ssd can be.
 AOKO USB C 3.1 to 2.5-inch 7mm to 15mm SATA Hard Drive Enclosure(UP to 15mm Thick HDD),Tool-Free Portable Hard Drive Case Converter with Dual USB-A to C Y Cable and USB A to C Adapter
SAR 105
AOKO USB C 3.1 to 2.5-inch 7mm to 15mm SATA Hard Drive Enclosure(UP to 15mm Thick HDD),Tool-Free Portable Hard Drive Case Converter with Dual USB-A to C Y Cable and USB A to C Adapter
SAR 105
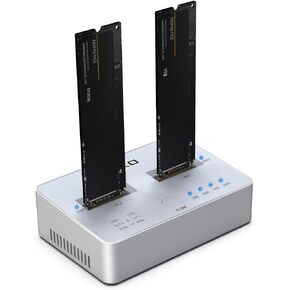 M.2 NVMe Cloner 4 in 1 Hard Drive Docking Station Clone Duplicaotr, AOKO Dual-Bay M.2 SSD Duplicator for NVMe SSD or 2.5’’/3.5’’ SATA Drives and mSATA SSD+ M.2 SATA SSD with Offline Cloning
SAR 418
M.2 NVMe Cloner 4 in 1 Hard Drive Docking Station Clone Duplicaotr, AOKO Dual-Bay M.2 SSD Duplicator for NVMe SSD or 2.5’’/3.5’’ SATA Drives and mSATA SSD+ M.2 SATA SSD with Offline Cloning
SAR 418
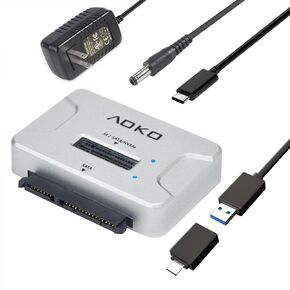 M.2 SATA/NVMe to USB Docking Station,Hard Drive Reader Adapter, External M.2 SSD Enclosure for M.2 PCIe NVMe and SATA SSDs, Compatible with SATA III HDD/SSD (M.2 Dock or SATA Adapter)
SAR 183
M.2 SATA/NVMe to USB Docking Station,Hard Drive Reader Adapter, External M.2 SSD Enclosure for M.2 PCIe NVMe and SATA SSDs, Compatible with SATA III HDD/SSD (M.2 Dock or SATA Adapter)
SAR 183
 -5%
AOKO NVMe to USB 3.2(10Gbps) SSD Reader Docking Station – Portable M.2 SSD to USB Adapter External NVMe SSD Enclosure for M.2 PCIe NVMe and M.2 SATA SSD, Compatible with 2.5'' SATA Dirve
SAR 164
-5%
AOKO NVMe to USB 3.2(10Gbps) SSD Reader Docking Station – Portable M.2 SSD to USB Adapter External NVMe SSD Enclosure for M.2 PCIe NVMe and M.2 SATA SSD, Compatible with 2.5'' SATA Dirve
SAR 164