- Shopping, made easy.
- /
- Get the app!
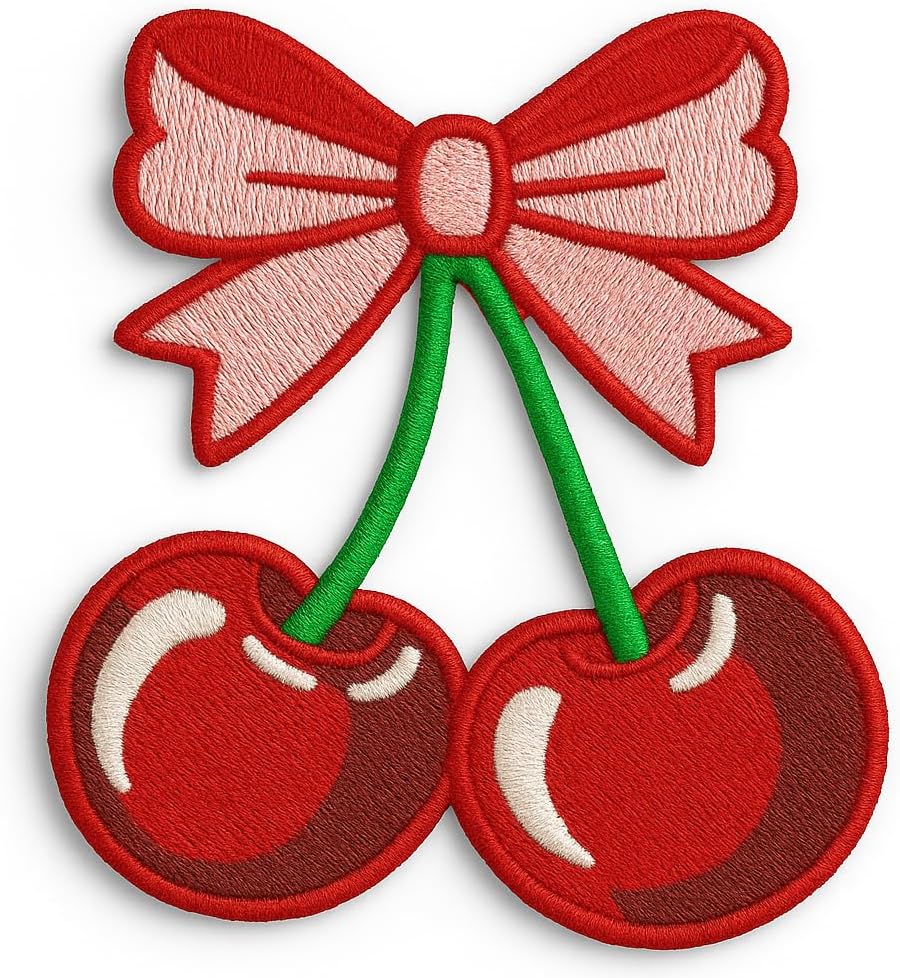
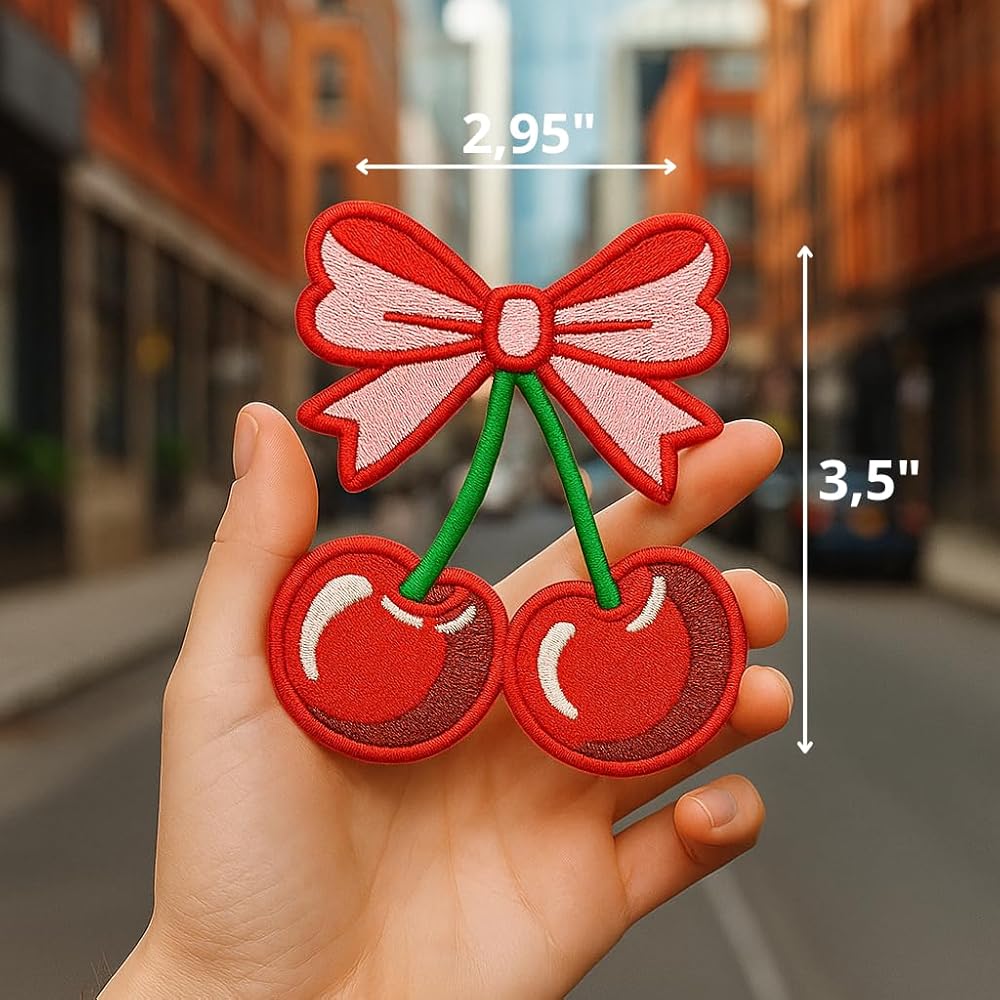
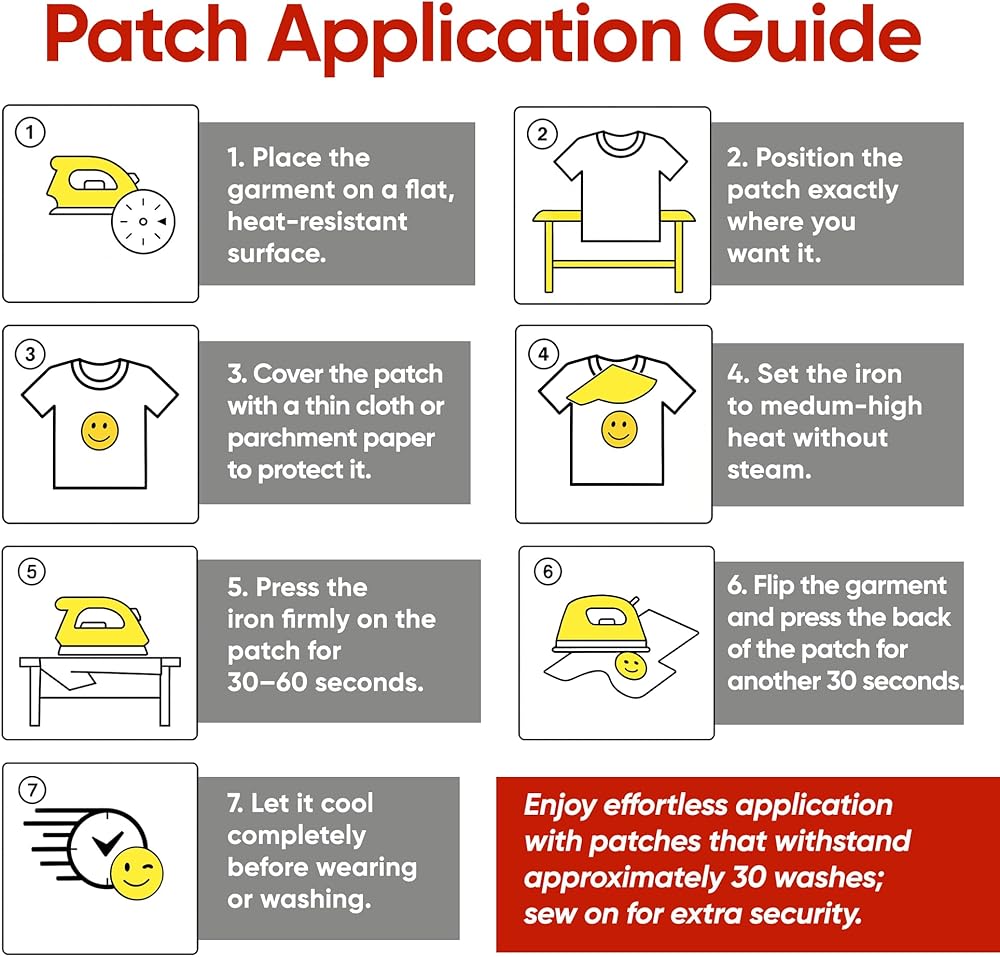
Iron-On Patch Instructions:
1. Set your iron to the appropriate heat setting for the type of fabric and patch you are using.
2. Lay the garment on a hard, heat-resistant surface when applying your iron-on patch. Avoid using a padded ironing board as it may not provide strong adhesion.
3. Place the patch on the fabric, making sure it is positioned correctly.
4. Place a piece of parchment paper or a press cloth will work just as well.
5. Apply firm, constant pressure straight down with the iron for about 30 to 35 seconds without moving the iron.
6. Allow the patch to cool for a little before removing the protective sheet.
7. Turn the garment inside-out and repeat the process on the back side of the patch for about 30 seconds. Be sure and apply constant pressure once again.
8. After applying heat to the patch, check gently if the backing has adequately adhered to the garment. Allow the patch to cool down completely before handling it further. This will help to ensure that the heat-seal backing is securely attached to your garment. If necessary, repeat steps 4-7 to ensure proper adhesion.
 2880 Pcs Green Rhinestones for Crafting, SS10 Hotfix Rhinestones, Flatback Crystal Rhinestones, Color Rhinestones, Bulk Rhinestones for Clothes Decoration DIY Crafts(3MM)
SAR 20
2880 Pcs Green Rhinestones for Crafting, SS10 Hotfix Rhinestones, Flatback Crystal Rhinestones, Color Rhinestones, Bulk Rhinestones for Clothes Decoration DIY Crafts(3MM)
SAR 20
 Pellon Stitch-N-Tear Lite Embroidery Stabilizer-12 X11 Yards,White
SAR 92
Pellon Stitch-N-Tear Lite Embroidery Stabilizer-12 X11 Yards,White
SAR 92
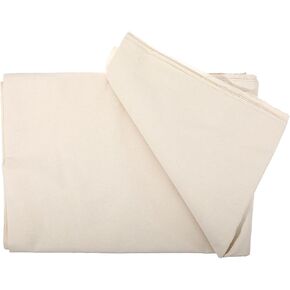 63in 5.5Yards Cotton Muslin Fabric Unbleached Natural Muslin Cotton Fabric for Sewing Apparel Cloth Roll Backing Draping Material by The Yard Fabrics
SAR 73
63in 5.5Yards Cotton Muslin Fabric Unbleached Natural Muslin Cotton Fabric for Sewing Apparel Cloth Roll Backing Draping Material by The Yard Fabrics
SAR 73
 Nogeqi 1/2 Inch Black Bias Tape for Sewing,10 Yards Black Double Fold Bias Tape,Binding Tapes Hemming Tapes for DIY Garment Sewing, Seaming, Piping, Quilting
SAR 24
Nogeqi 1/2 Inch Black Bias Tape for Sewing,10 Yards Black Double Fold Bias Tape,Binding Tapes Hemming Tapes for DIY Garment Sewing, Seaming, Piping, Quilting
SAR 24