- Shopping, made easy.
- /
- Get the app!
How to Apply Your Masterpiece What You'll Need 1.Your StitchMotive patch 2.Your garment or fabric 3.An iron 4.A spray bottle or small cup of water 5.A pressing cloth (thin cotton, a handkerchief, or parchment paper works great) 6.An ironing board or mat Steps 1.Place it: Lay your garment flat and position the patch exactly where you want it. 2.Add water: Lightly dampen the patch and surrounding fabric with water. This helps the adhesive bond properly. 3.Press the front: Cover the patch with your pressing cloth. Iron on medium heat, pressing firmly for about 2 minutes. 4.Press the back: Flip your garment inside out. Iron the area directly behind the patch for another 2 minutes. 5.Seal the edges: Flip right-side out again. Go back over the edges with the pressing cloth to make sure everything is flushed and sealed. Check it: Let it cool, then gently test the edges. Still lifting? Repeat steps 3–5. StitchMotive Pro-Tips: 1.For the Long Haul: If you rely solely on the iron-on method, we highly recommend hand-washing your item to keep the art looking pristine. Please avoid the washing machine. 2.Make it Permanent: For items you wear or wash frequently, adding a few quick stitches around the edge is the best way to make your patch permanent. 3.Hand-Finished Edges: We finish the edges of every patch by hand, meaning no two are exactly alike. These subtle differences give your piece its own unique character. 4.Ironing time varies: Every iron is different. The heat needs to fully melt the backing glue, so your exact ironing time might vary slightly.
 -10%
FoammaUSA 3" x 14" x 14" Upholstery Foam Cushion Replacement
SAR 94
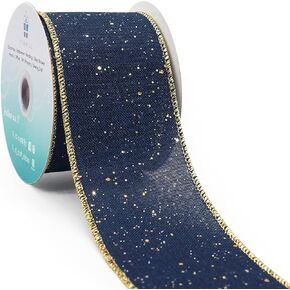 Blue Burlap Fabric Confetti Glitter Wired Ribbon 2.5" x 10 Yards Navy Color for Christmas Home Wedding Decor Gift Wrapping Tree Topper Bow Wreath Bouquet DIY Crafts
SAR 73
 YaHoGa 14 PCS Antique Brass Blazer Buttons for Sewing 23mm & 18mm JS172
SAR 73
 Presser Free Motion Shank Big Foot Low
SAR 152

 Saudi Arabia


